
If you know me at all, you probably know that I can often be found 'keeping my eye out' for something I would like to purchase. When I say I'm 'keeping my eye out' for something what I really mean is, "I haven't been able to find it for the price I want to pay." Such was the case for the 8-10 person dining table I couldn't seem to find and had been 'keeping my eye out' for since we moved into our new house some 9 months ago. This meant scouring craigslist, frequent trips to goodwill and other various thrift stores, and looking for furniture store sales. No dice. Part of the problem was that I had lofty ideas of this Pottery Barn beauty with the equally lofty price tag of $1500.

Then Christmas came and Josh was gifted with a new miter saw and a drill press to add to his growing tool collection. He knew of my frustration with not being able to find a large dining table in our price range and joked that now he could build me one. The idea was born. Now, my husband is super handy, but I never envisioned him a carpenter. But off he went looking for farmhouse table plans on the internet to see if he could figure out how to build me one. If you're familiar with the DIY world at all, then I'm sure you've heard of Ana White. She is a builder extraordinaire....and she provides building plans....for a farmhouse table! Now her farmhouse table plans were a little smaller than we wanted, but with a few recalculations, Josh had our table in the works.
I'm not about to do a step-by-step, you can visit Ana for that, but here are a few highlights of our process:
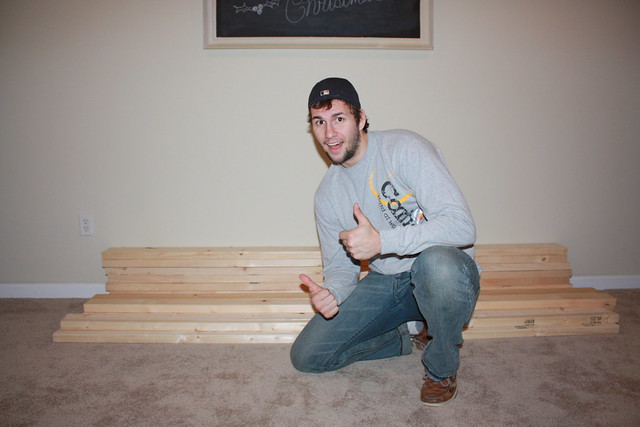
Here is Josh feeling excited about his wood purchase and ready to start the table.
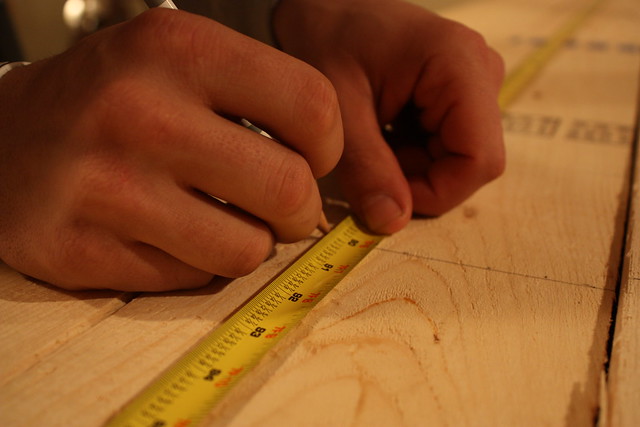
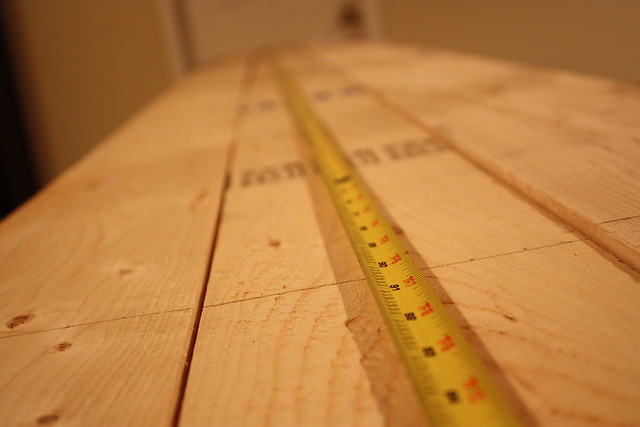
Measuring before making cuts. Josh's words to build by: measure twice, cut once.
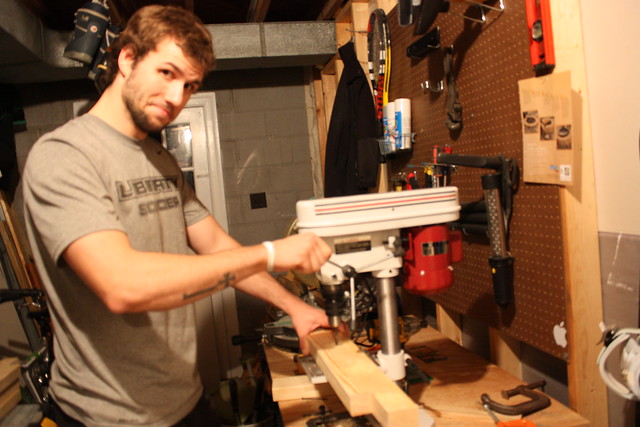
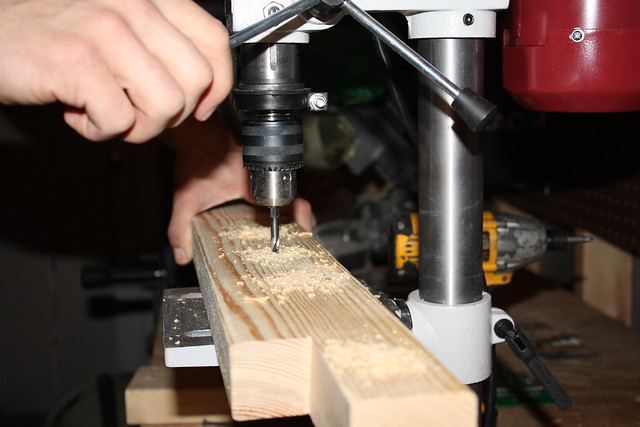
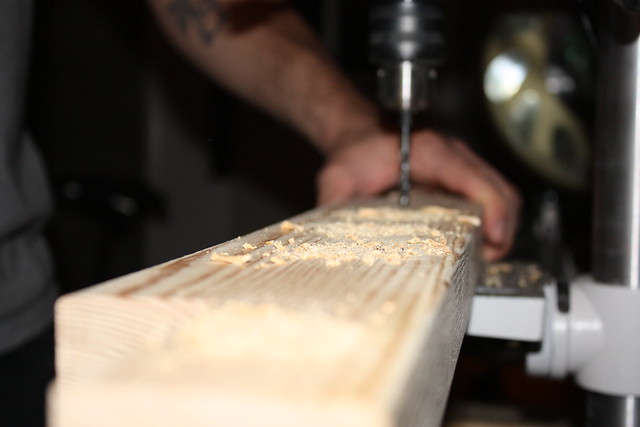
After all the cuts were done, Josh used his new drill press to make the screw holes.
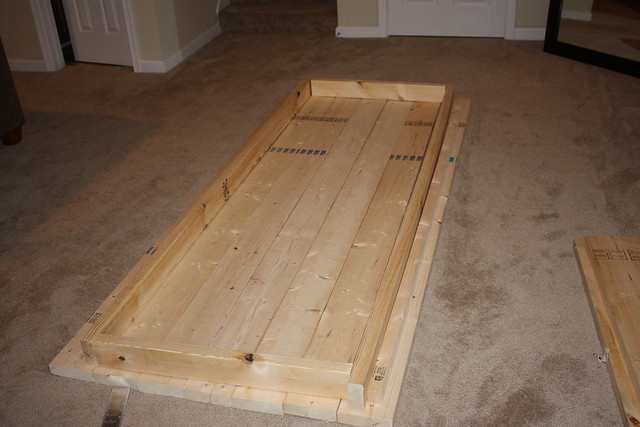
Once that was done, it was simple piecing together with screws. Voila - the frame!

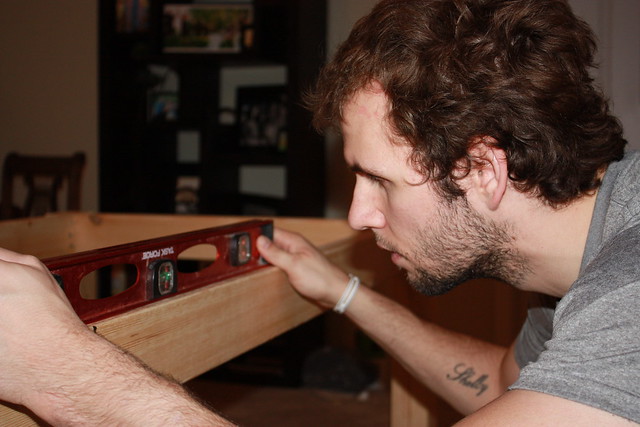
Here he is making sure his boards are straight. You should have seen this kid at Lowes trying to find straight boards, he is definitely a perfectionist in his work.
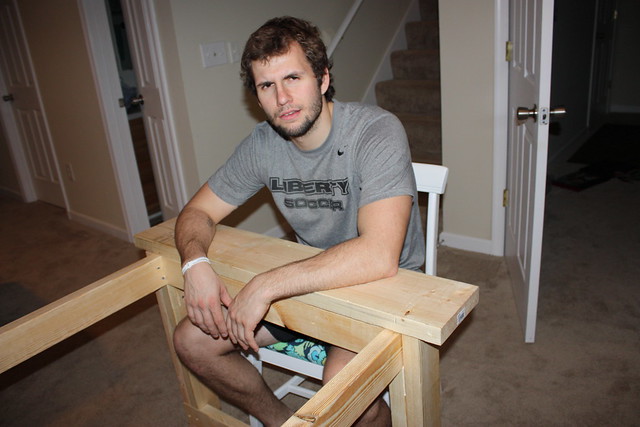
This is his "Seriously, Shelb?" face.
I was being persistent that I wanted someone to be able to sit on each end and I wasn't sure the breadboards would hang off enough. This is him proving me wrong.
A glimpse of the top-to-be.
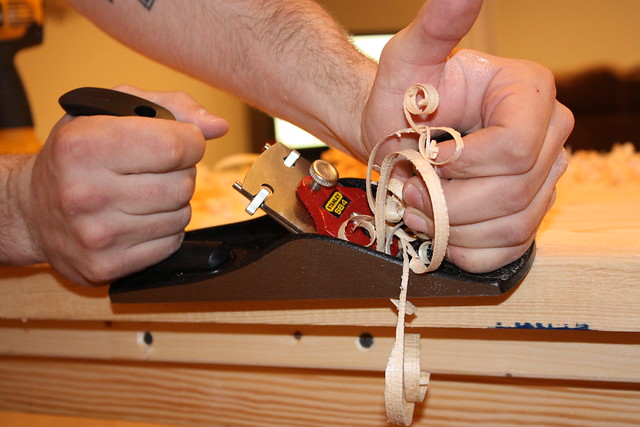
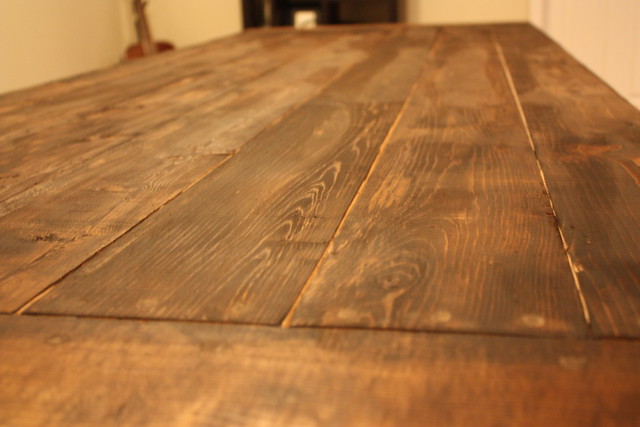
Once assembled, Josh planed the entire top to give it that rustic, this-has-been-in-our-family-for-years antique look.
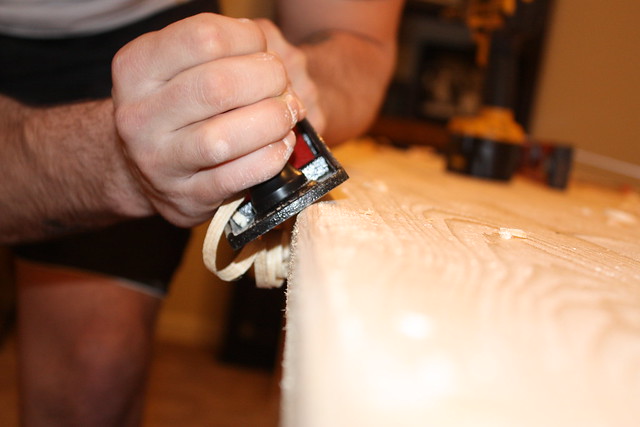
Wooden curly-q's :)
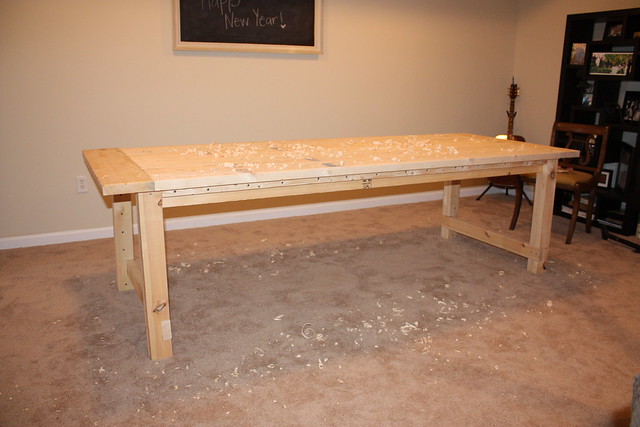
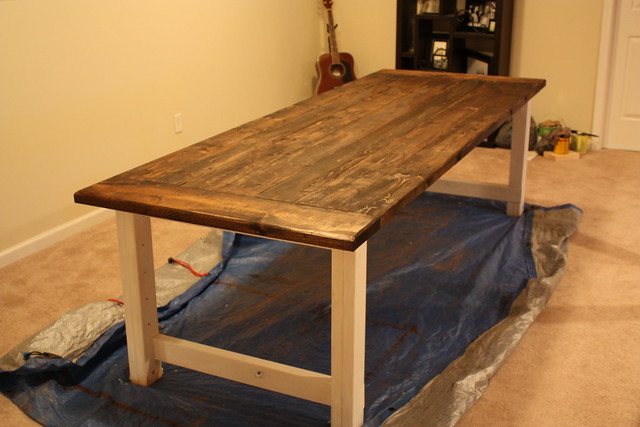
Assembled and planed.
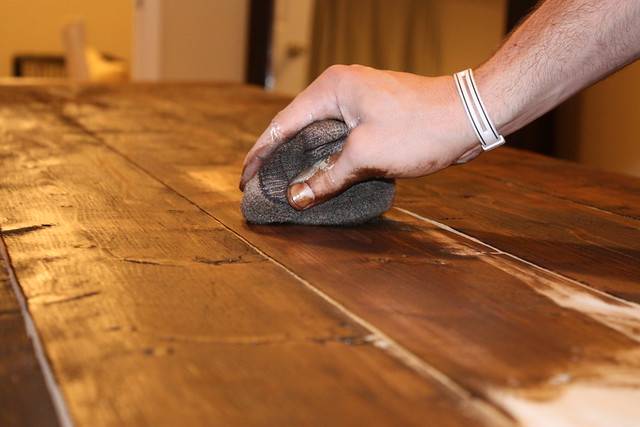
Now, for the stain. We decided we wanted a dark top and a white painted bottom for that antique look we were going for. Josh was in charge of stain.
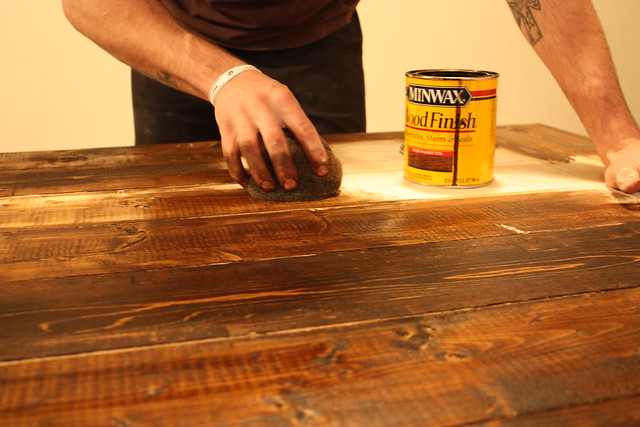
I love how the character in each piece of wood came out as the stain went on. You could have convinced me they were reclaimed floor boards.
I was in charge of painting. Two coats.
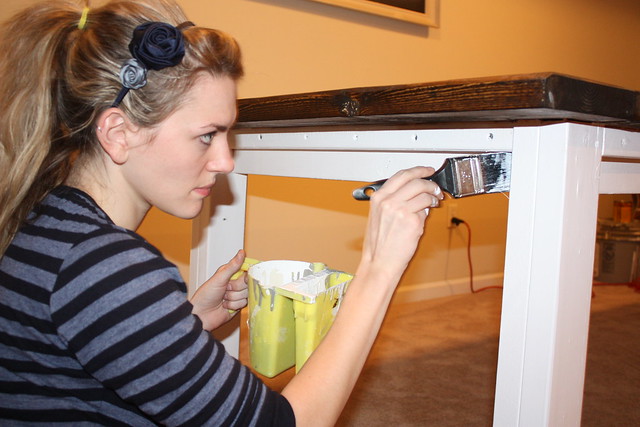
While I was ready to be finished, "We don't need to paint or stain the underside, no one is going to be looking under there", my 'do it right the first time' husband insisted on staining the underside. "It definitely looks more polished", I relented.

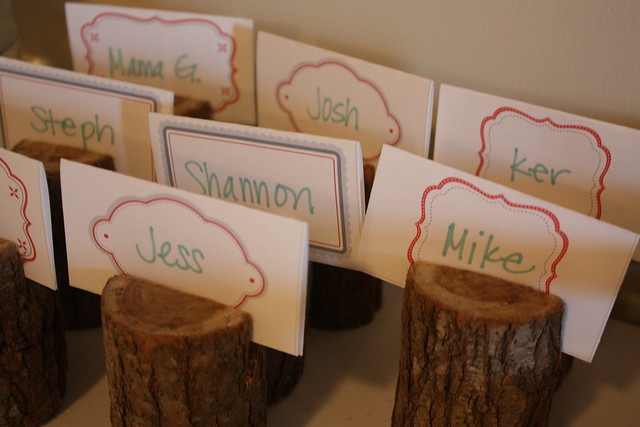
My finishing touches on the table using the metal stamping kit I found in my stocking this Christmas.

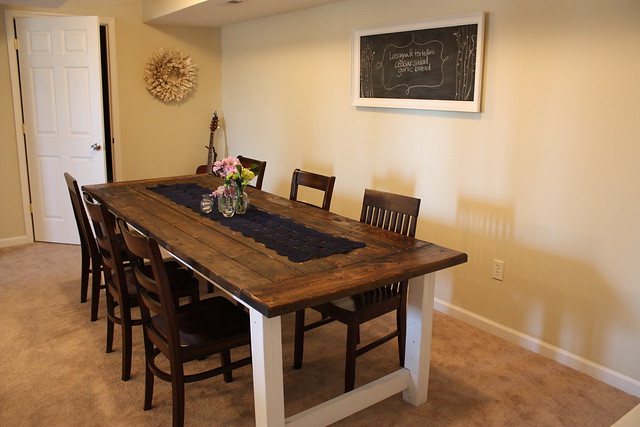
Our finished product. Pottery Barn who?
The final step was to prepare the table to fulfill its purpose - a dinner party.
Put out a fresh flower centerpiece....

invite people you love...
...enjoy dinner with friends on your new table!
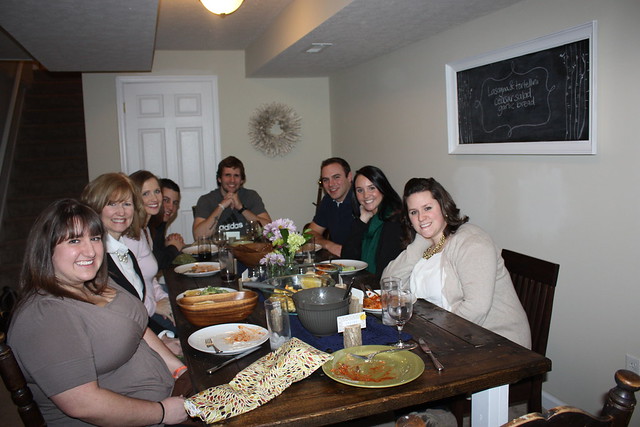
And I just have to gush about my husband, he built this table in a little over a week, and it is way more beautiful and well-built than anything I could have ever found at Pottery Barn (and was 1/20th the price!). I am so proud of him. It was a true labor of love.
*Check these out if you're wondering about the book wreath or chalkboard pictured above.
This project has been featured!
Also, shared at:
*Check these out if you're wondering about the book wreath or chalkboard pictured above.
This project has been featured!
Also, shared at:


great table! excellent job!
ReplyDeleteOkay so I need to get my order in for my coffee table...
ReplyDeleteWhat a sweet honey!! You're a lucky girl! And, seriously, what a gorgeous table. Nicely done. (I popped over from Ana-White.com.)
ReplyDeletecan you explain how he planed the entire top for me? Im curious did you do just the edges or what you mean by the "entire top" and could you post some close up pictures of the top so i can visualize it? thanks so much! you guys did an AMAZING job! This is the table my husband and i plan to make too...gotta love ana's site!!!
ReplyDeleteHi There,
ReplyDeleteI just found your blog as I was looking through furniture options for our kitchen...love your table! And I really love your placecard holders!! Thanks for sharing.
Jennifer, when I said he planed the entire top, I mean that he used the plane to even out where several of the boards didn't meet up perfectly across the top. This also helped to add even more of that rustic touch we were going for. Hope that helps! Good luck to you and your husband in your table-making adventure! :)
ReplyDeleteAmazing!!! I also have been looking for the perfect table and this may just be it!! You and your husband did an amazing job!!! I wish my husband was handy! Gah only if yall lived in Virginia! =)
ReplyDeleteGorgeous!!
ReplyDeleteWhat kind of wood did you use? I am just starting to research doing a similar project. I am soo envious of your gorgeous table.
Wow. Awesome! Very inspiring. I was contemplating buying a custom made farm table for $1,000. I think I have a new plan now. Love the color contrast too. Great job!
ReplyDeleteYou guys did a great job! It looks fantastic. And you will have it for a long time. Love that you signed it :)
ReplyDeleteThis is a beautiful table and I can't believe you built it yourselves! Great job!
ReplyDeleteI love it! What color stain did you use?
ReplyDeleteApril, the stain color is minwax wood finish - dark walnut. Hope this helps!
ReplyDeleteamazing. that hubby is a keeper!1
ReplyDeleteTana
Awesome! Great job. I've got to show this to my son. He's just gotten into making stuff for his new home & could use a good table.
ReplyDeleteThank you for linking up this great post last week! {Im a lil behind, eeekk!}
ReplyDeleteIts party time AGAIN!!! xoxokara
*ENTER LINKY PAR-TAY Here! *
Pretty girl...THAT table is AWESOME!!! Im ready to come join the party!
Hi Shelby! I just wanted to let you know that I'm linking to this post from my blog. I love the table. It looks wonderful. Thank you for sharing!
ReplyDelete~Sarah from Ugly House Lovely Home
http://uglyhouselovelyhome.blogspot.com
new follower after seeing you featured on kara's blog (i was featured too, but mine doesn't compare)! laura@imnotatrophywife.com
ReplyDeletelove the taable
I love this! You have just inspired me! I'm so excited...I have this super ugly honey blonde colored table that I inherited...and have been wanting to change it...and you have given me an idea..THANKS!
ReplyDeleteWow, and WOW! This is a fantastic piece! You both are so talented. I am so glad I clicked on the thumbnail on MMS!
ReplyDeleteI do a link up party every Friday too, I would love it if you stopped by.
www.redoux.blogspot.com
Have a lovely weekend! -K
Perfect! I love it, my husband and I built a desk similar to this that we love!
ReplyDeleteI would love to have you come do a special guest post about this project on Remodelaholic if you are interested please let me know! Thanks! Cassity
He could make a lot of money doing that! It turned out awesome. I'm here from Kara's party and I'm your newest follower. Great blog.
ReplyDeletexoxo,
Kim
Hey there, I featured you on my blog today, but I can't find an email for you. Would you stop by if you can? I would love to give you the "featured button" if you are interested. Thank you so much for linking this project up!
ReplyDeletelove this!!!
ReplyDeleteHoly cow! I'm showing this to my husband NOW! I've been wanting a table like this too, I am super impressed. Thanks for sharing!
ReplyDeleteJust FYI, we are finishing up our table right now :D We pretty much used Ana's exact plan. Thanks so much for the inspiration, I think we will have this in our family for years.
ReplyDeleteShelby I ADORE this. I've always told Scott that I want our dining room table to be big, and something that will be a lifetime thing, since so many memories are created around it. How great that yours was built by you and Josh's hands! I love love love it. :)
ReplyDeleteAWW, your Blog is very interesting!!
ReplyDeletegreetz from your new Follower Isi
Oh I love this!! It looks fabulous! I featured this over at my Friday 5! Thanks for sharing!
ReplyDeletewww.modernwivelyhood.blogspot.com